

Fall is here….love the fall! Living in the desert, us desert rats are ready for Fall. I just had to share with you today this beautiful table runner made from burlap…

This isn’t a easy 1, 2 ,3 put together craft….but it is soooo worth it!!!
I tend to lean on the side of contemporary–rather than country–in most of my decor, except when I am decorating for fall. Then, I pull out the burlap, the wood, the leaves, and the twine. I love the cool air and earthy smells of fall. I LOVE the warm colors. And I LOVE this table runner.
It is fun and easy (though not quick–I’m not gonna lie). I had it in my mind as a concept, so I wasn’t entirely sure how it would work. It will be considerably faster for someone following my tutorial, than it was for me figuring it out as I went!
This is a highly customize-able craft. Once you see how it is done, you can create your own design and make it fit your aesthetic desires.
You will need:
- 1 plain burlap table runner. I made mine by hemming the sides of a strip of burlap to fit my table.
- 1/4 -1/2 yard of burlap in 2-3 complimentary tones (one can match runner)
- Tacky Glue
- Jute Twine
- 1/2-1 yard Heat-n-Bond or similar product

I stuck with earthen tones for my burlap. I tried Elmer’s Glue-All also, but I don’t recommend it. It was too runny for the purpose. Tacky Glue is just that–tacky.

This worked well enough, but I wouldn’t hesitate to by the not “lite” version since this is burlap. Any bonding that was less-than-secure after ironing this on was taken care of by the gluing step.

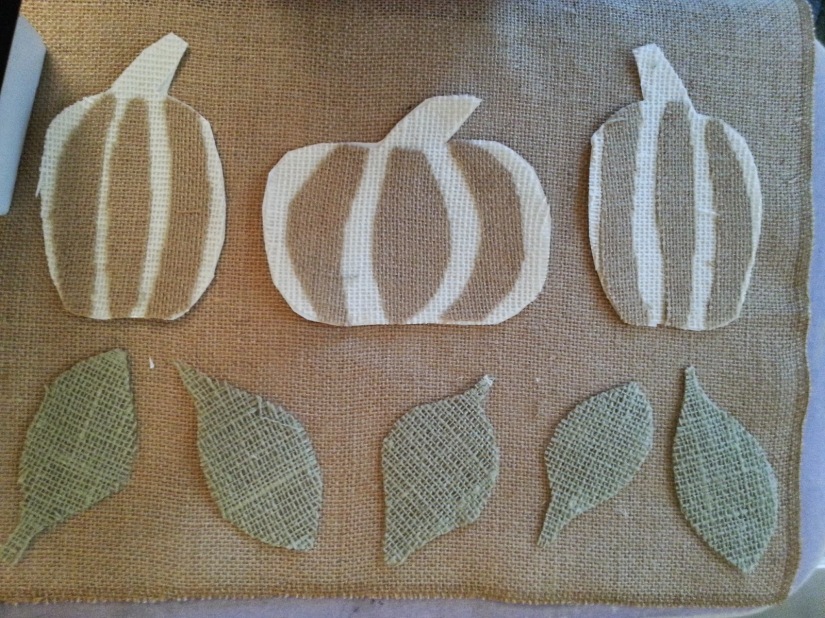
1. Find or create some pumpkin and leaf stencils/patterns out of paper. I traced some leaf decorations I already had and free-handed the pumpkins. Many templates are available online.

2. Pin your leaf and pumpkin patterns to some of the coordinating burlap and cut them out. I didn’t end up liking the way the maple leaf design looked on my runner, but I plan to use it on a pillow!

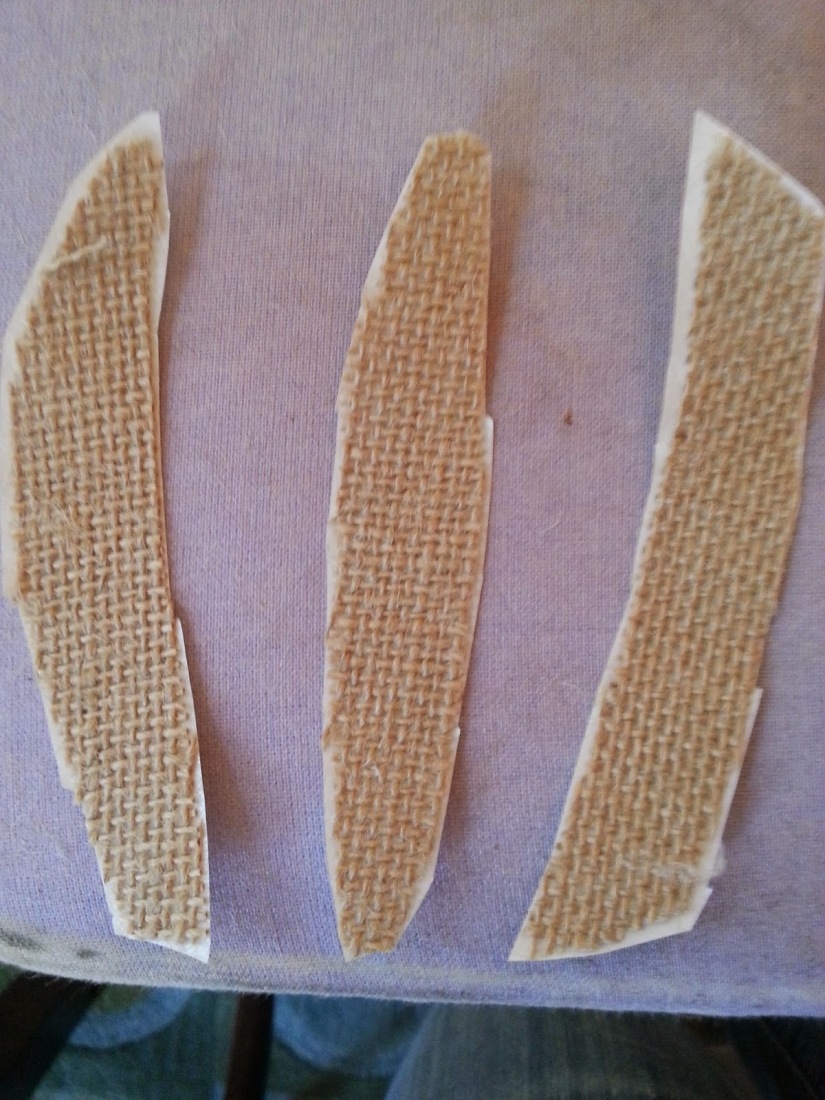
3. To make the coordinating parts on the pumpkin: Cut a pumpkin shape out of two different colors of burlap. Here the white burlap is on the bottom, the brown on top. Trace lines as shown to divide the pumpkin into 7 curved strips. Cut the strips out. Repeat this for each pumpkin you are making.
4. Lay out your design. I played around with mine a lot. I originally planned to do this “applique” over the entire runner, but because I have a fairly large center piece I use in the fall, I decided to just put it on each end.

5. Read the directions on the Heat-n-Bond. I will walk you through it as well, but reading it will help. Beginning with the top layer of the applique (here, the pumpkin strips) bond the Heat-n-Bond to the back (paper will still be attached).
**Place a piece of disposable fabric or paper over your ironing board when you are working with the iron on adhesive The glue will get on everything below when you turn it over to iron. (I should have shown this so you weren’t looking at my old, stained ironing board cover!)
6. Cut out the pieces with the paper backing still on.
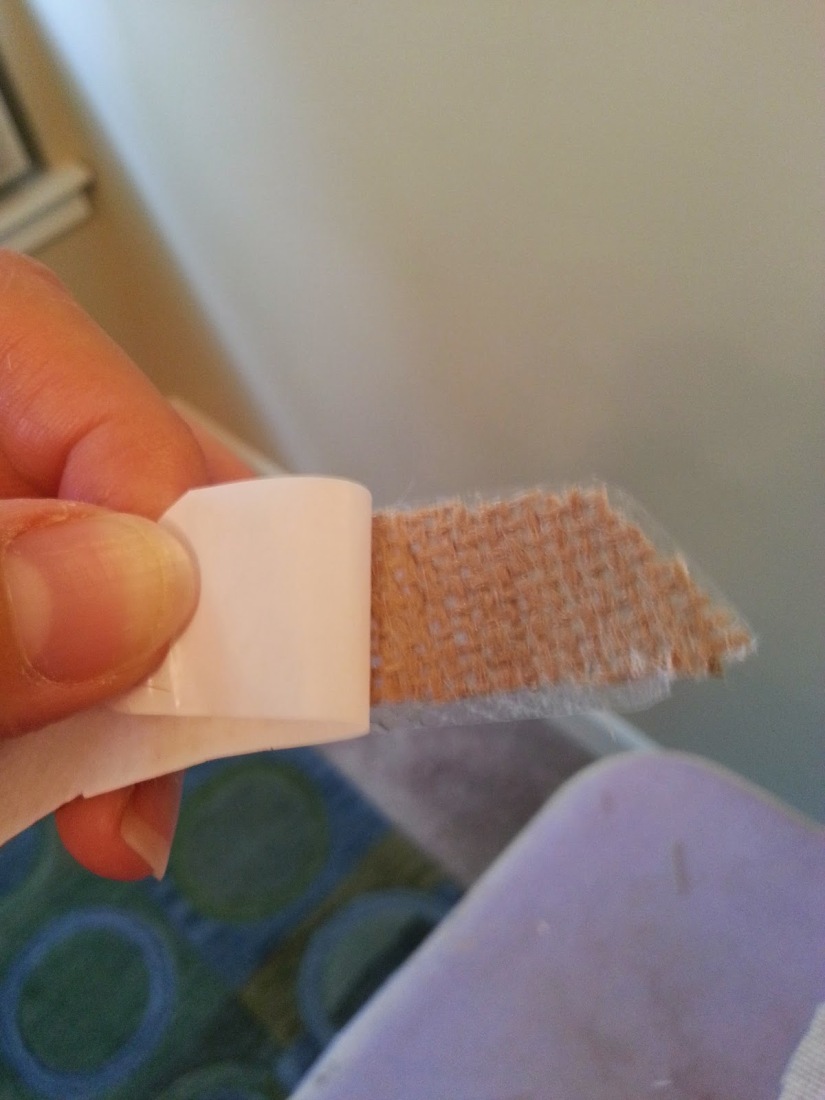
7. Remove the paper, leaving the clear bonded film on each piece.
8. Attach the pieces to the pumpkins by ironing in place per the Heat-n-Bond directions.
9. Repeat the process for the leaves and the pumpkins–so each piece is cut out with the film exposed. 10. Place each piece where you want it on the table runner and iron in place.

11. Using the Tacky Glue, attach the jute twine along all the seams of the applique. I added a line of twine up the middle of the leaves to add some dimension.I also made a few curly-cue vines with the twine at the top of the pumpkins.
This glue will take about 6-8 hours to dry clear. I pressed down the twine and re-positioned it a few times as it was drying.
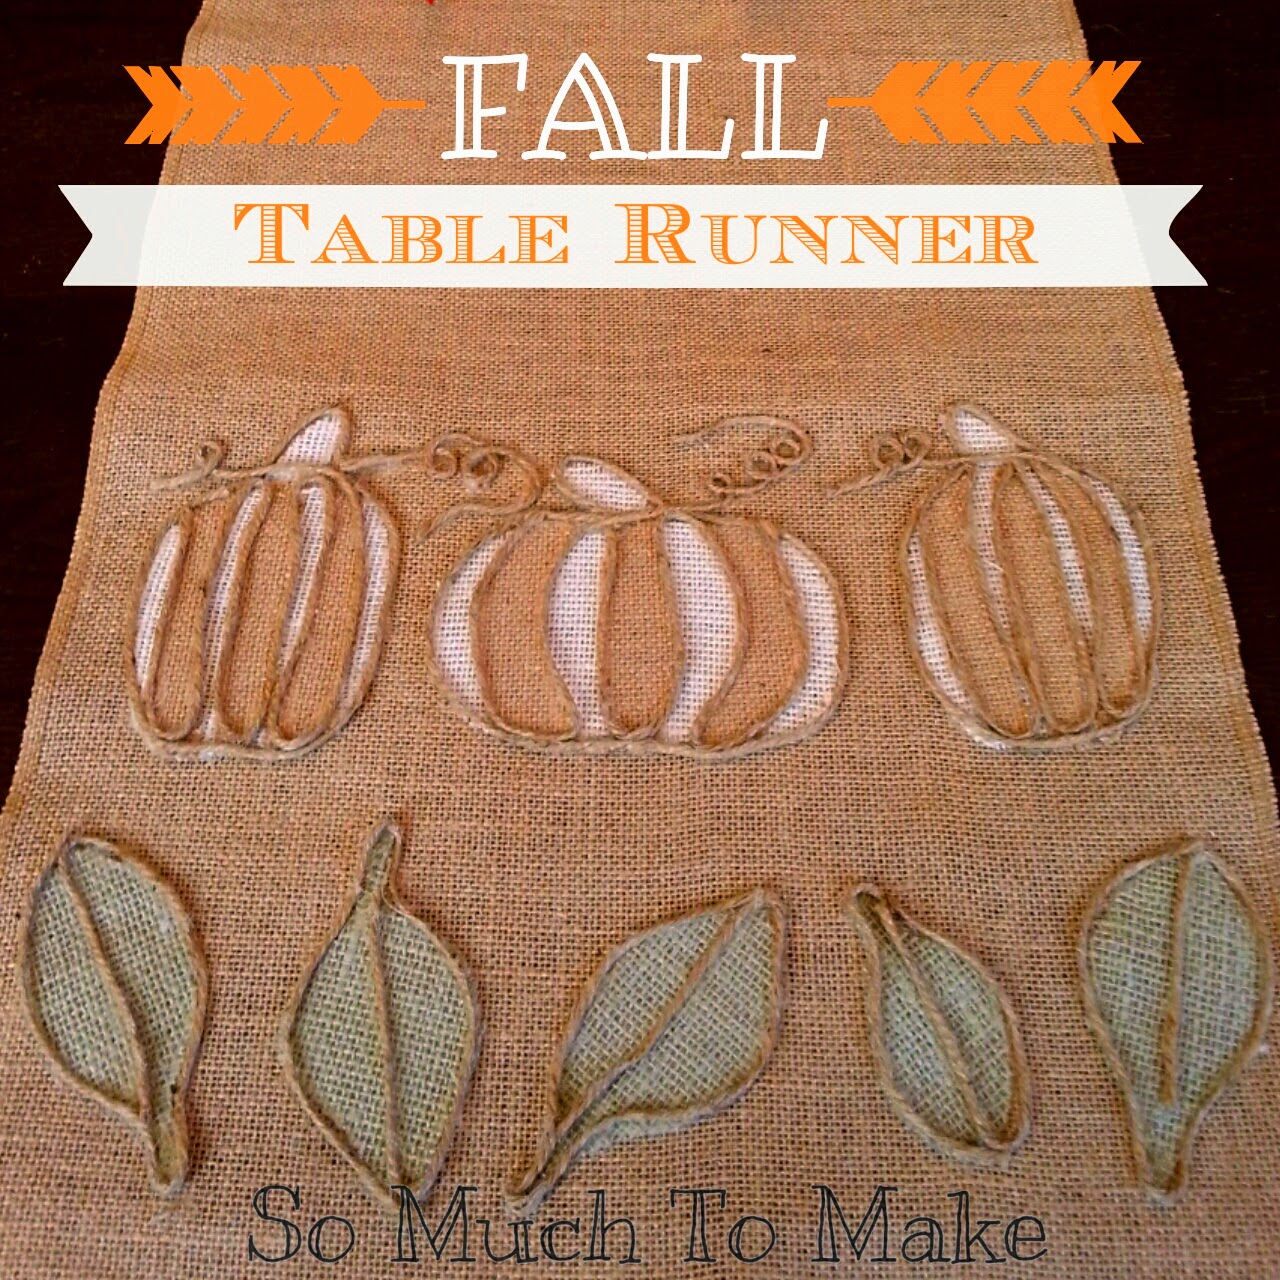
This looks so awesome! Looks better than store bought!!


Wow~! That is super cool!
LikeLiked by 1 person
Thank you so much!!
LikeLiked by 1 person
What a pretty idea =) .. awesome share!
LikeLiked by 1 person
You should make one to go under your beautiful flower arrangements in your etsy store!
LikeLiked by 1 person
Thank you! =) =) it really is pretty
LikeLike
Love it!
LikeLiked by 1 person
Me too!!! Thank you!! Are you going to do it?
LikeLiked by 1 person
That would be great, but I’m still trying to deal with my living room. The walls/trim are done now. I have one door left to stain. Then it’s on to the floor.
LikeLiked by 1 person
Wow…your doing some awesome stuff! Wish we lived closer.
LikeLiked by 1 person
I love all the texture you brought into this project!!
LikeLiked by 1 person
I’m so happy you like it!
LikeLiked by 1 person
That is so pretty!~Kim
LikeLiked by 1 person
Thanks…how are you doing?
LikeLiked by 1 person
Really well, still in recovery mode from hosting a virtual book party, entertaining a friend for 4 days, and then having to deal with some family drama… but NOW, the world is my oyster… if I could just find a damn pearl… that’s right clams, gotta find a clam first! HA!
LikeLiked by 1 person
oh I’m so sorry to hear that Kim ;( Now is the time to just relax and unwind. Helps tremendously with mine. I
LikeLiked by 1 person
Yes, will do…
LikeLiked by 1 person
Much love, and well wishes.❤
LikeLiked by 1 person
I love this! Absolutely perfect for this time of year, and it turned out so beautifully! 🙂
LikeLiked by 1 person
Thank you so much!!!
LikeLiked by 1 person
This is SOOO pretty! Wonderful job!
https://organizational-bliss.com/
LikeLiked by 1 person
Thank you!!! So much!
LikeLike
Love the design on burlap. So pretty Great idea
LikeLike
I love this runner! I can’t wait for fall!
LikeLike
Absolutely phenomenal!
LikeLike
What a pretty table runner Kelly, you are so creative 🙂
LikeLike
…and it’s inexpensive to make and last year after year. I just spray it with fabric spray each year after storing.
LikeLike
Kelley this is gorgeous! I can’t wait for Autumn x
LikeLike
It’s almost time! I’m working on a couple of them now! Thank you!!!
LikeLiked by 1 person