

1. Pom-Poms
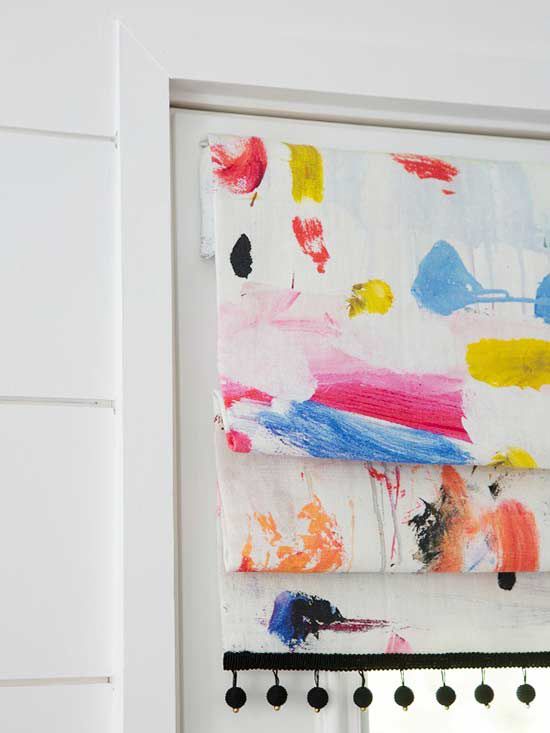
Your window may be the perfect place to bring bright color and a fun pattern into your space. Naomi paired a bold abstract print with a whimsical pom-pom trim for these shades that stole the show in her recent kitchen makeover, (Proof you don’t have to save the pretty window treatments for your living room or bedroom!)
2. Monogram
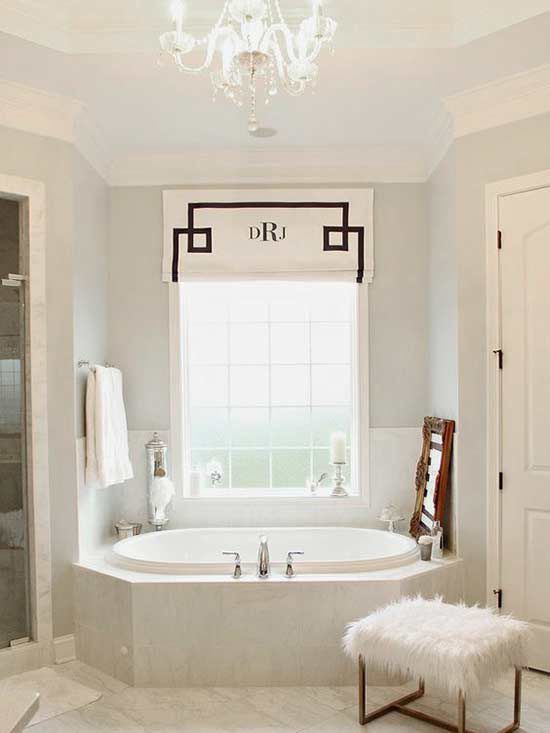
This tailored shade may look expensive — and complicated — but you don’t need a sewing machine or an embroidery machine for this simple DIY window treatment. Julie made a faux roman shade using her favorite $5/yard fabric, a piece of wood, and packaging tape! The monogram was added using freezer paper. Pretty ingenious! She shares the full tutorial on Less-Than-Perfect Life of Bliss.
3. Tablecloth
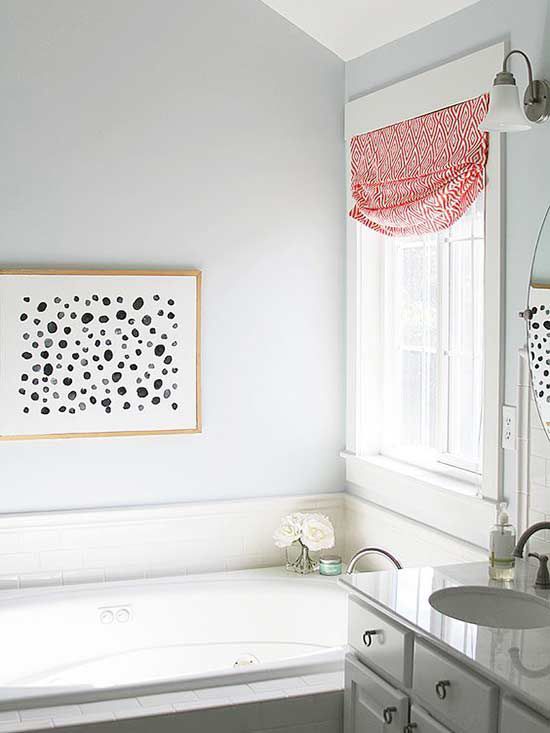
Have a bare window that just needs a little something? You may not even have to hit the fabric store. Jen created a no-sew relaxed roman shade for her bathroom using a patterned tablecloth and some fabric glue. And, the install process was just as easy. She used thumbtacks to attach it to the window. No hardware needed!
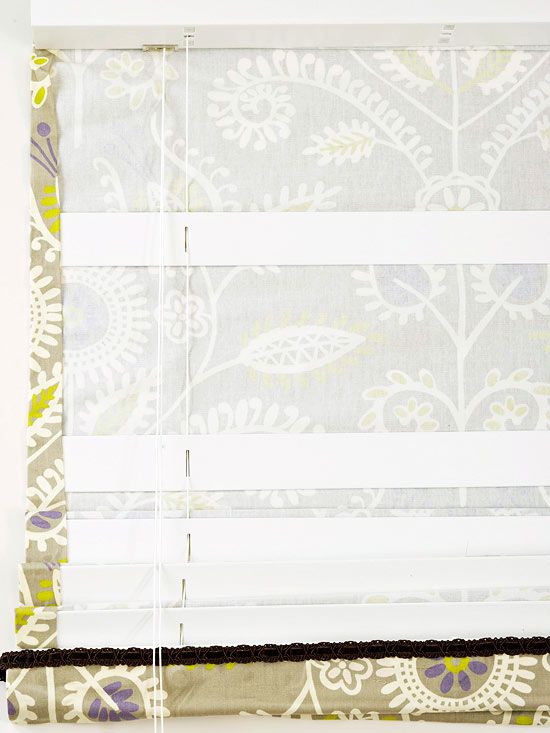
4. Patterned
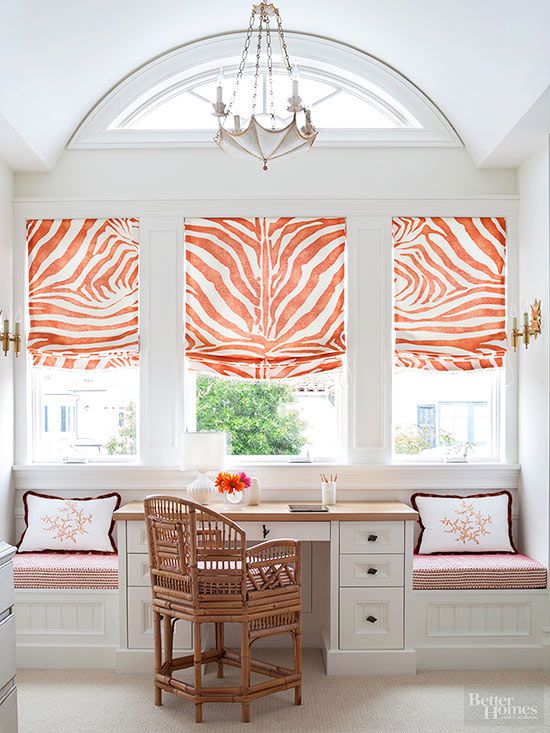
Dreaming of a certain fabric for your windows, but it seems out of your reach — or budget? Consider creating your own design by using fabric paint on a plain roman shade. If you’re not up to free-handing the pattern, there are plenty of fun stencils in almost any design. Replicate the look in this image by using a similar zebra stencil like this one.
Want to Make Your Own?? Here is what you will need:
- Miniblind to fit the window
- Midweight upholstery fabric cut 6 inches wider than the window and 12 inches longer
- Fabric glue or
- Flat artist’s paintbrush
Fabric tip: A fabric with some body will hold the folds nicely and filter sunlight while providing privacy. Look for a fabric in the home decor section of a fabric store, which tends to stock these heavier fabrics. Gather the fabric about a yard from the end and let it fall to see how it drapes. Look for slightly billowy folds for the best shades. Find a nice large surface to work. I used my dining room table.
Step 1: Set Length

Lay the blind on your work surface with the front facing down. To set the length you want the shade to be, follow package instructions to adjust the plug underneath the thick bottom slat.
Step 2: Remove and Set Slats
Snip away only the thicker strings that connect the slats on both the front and the back. Don’t cut the string in the middle of the slats, which is what pulls the shade up and down.

Carefully snip away the ladder cords. The pull cords will stay in tact. These are on top and thinner than the pull cords. You need them to raise and lower the shade.

Carefully snip away the ladder cords. The pull cords will stay in tact.The ladder cord is held together at the top of the binds. Just snip away the fastener to remove the cords. Now the blinds will move freely p and down the pull cords!

Next you will need to pop off the plugs located on the bottom rod and set aside. To do this you’ll need to undo the pull cord to remove the blinds. There are 2 plastic caps underneath the bottom bar of the blinds. Pop those open and use a needle or pin to fish out the knotted pull cords. Snip off the knots and remove the bottom bar. Be sure to set aside the plugs.

Next you pull out the pull cord and cut off or untie the knot.

Now you need to cut the cords to the length you desire, typically the length of the window plus a few extra inches for the knot. Tie a knot back in the cord and replace the plugs.

An example: You have a window that measures 52 inches long. To get those really nice large fold you see on the roman shades, you will use 13 blinds in total. Since that would include the bottom bar, You will need to keep 12 blinds on pull cord. Remove everything else but the blinds you want to keep. Thread the pull cords through the bottom bar and tie the ends into tight, double knots. Now your mini blind system has 12 blinds, a bottom bar and a set of long pull cords.
Prepare the fabric
- Cut your fabric to size adding 2 inches to the width and 2 inches to the length for hems.
- Lay flat and fold over 2 inches on each side and press.
- Then fold over 2 inches on the top and bottom and press.
You’ll want it to be the width of the blinds plus an extra 2 inches on each side. .Measure how long the shade will hang over the window and divide the measurement by seven. And the length should be the length of the window plus an extra two inches on each end. Once you have your rectangular piece trimmed and cut, iron it flat. This is how many slats you will need to leave on the blind strings. Snap off and remove the rest.
*If you choose to line with a liner, cut it to the exact measurement of the window, without all the extra inseams.
Place fabric face down under the blind. Account for the fabric that will be wrapped around the top of the blind and lay out the slats in 7-inch intervals. Mark these placements on the blinds. Mark the fabric where it folds at the sides, top, and bottom of slats. Remove the shade and press the fabric folds to create the hems.


Step 3: Secure Fabric

Place the fabric under the shade and use the paintbrush to brush glue onto the front side of the slats. Secure into place at the marked 7-inch intervals, tucking the ends of the slats beneath the folded edges. Use clothespins to hold the fabric in place while the glue dries.


So if you have some of those awful to clean mini blinds and would love to update that window they are on….this is such a fun and beautiful way to turn those mini blinds into something beautiful.

Awesome idea! I need to replace a couple of blinds this summer. I’ll have to give some thought as to whether this will work for us.
LikeLiked by 1 person
It is so easy!!
LikeLiked by 1 person
It looks like it. 🙂
LikeLiked by 1 person
❤️️
LikeLike
Reblogged this on All About Writing and more.
LikeLiked by 1 person
What a great idea!!!! I have 2 french doors with windows that I’d love to cover up with curtains like these. Thanks for sharing!
LikeLiked by 1 person
This is the perfect solution. You also may want to check out my post on : https://kelleysdiy.com/2019/02/07/window-privacy-2/
LikeLike
Nice! You make them seem not so scary to make!
LikeLiked by 1 person
They are so easy to make. I have made these several times for myself and friends. You will love the result.
LikeLiked by 1 person
Reblogged this on anita dawes and jaye marie.
LikeLiked by 1 person
Thank you for the reblog❤️️
LikeLike
Masses of helpful advice and brilliant ideas here!
LikeLiked by 1 person
I am so glad you liked the tutorial. They really are easy to make. I have made these for myself and friends also. The tutorial may sound confusing a little…some of it hard to put in words. But if you need any help….I am here!😍❤️️
LikeLiked by 1 person
Bless you!
LikeLike
😍☺️Right back at you honey!
LikeLiked by 1 person
Good idea!
LikeLiked by 1 person
😍❤️️thank you❤️️
LikeLike
I like the monogrammed one – very classy look.
LikeLiked by 1 person
Thank you Dolly, We think alike honey! These are really so easy.
LikeLiked by 1 person
I can see that. I have lace curtains, though, so not for me, otherwise I would’ve probably gone for this look.
LikeLike
☺️❤️️
LikeLiked by 1 person
Good idea! 🙂
LikeLiked by 1 person
It is! Get that expensive roman shades look so easily, and inexpensive.
LikeLike