

I was looking around the internet and I found some of the most clever ‘before and afters’
You will not believe the difference in these…
To This:
What a difference…so light and airy!
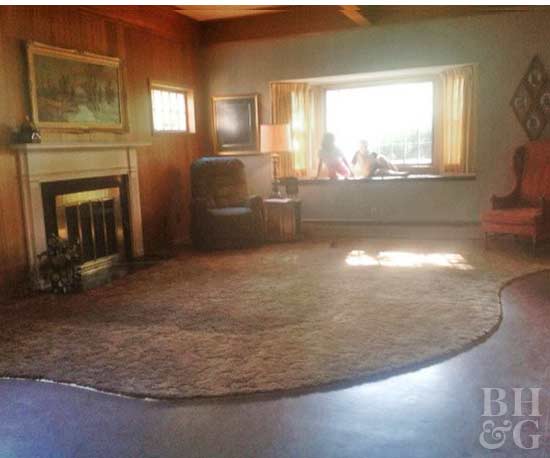
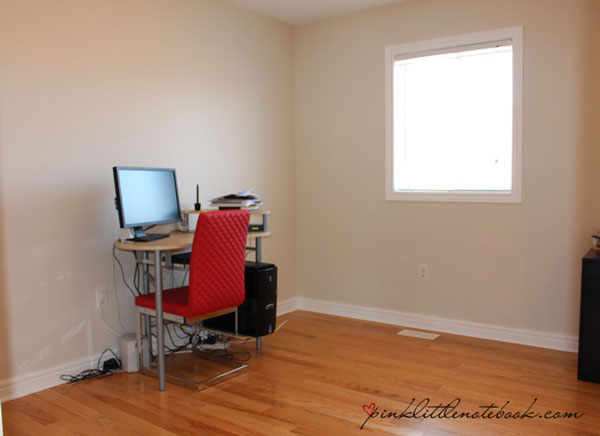
Before: Office Features
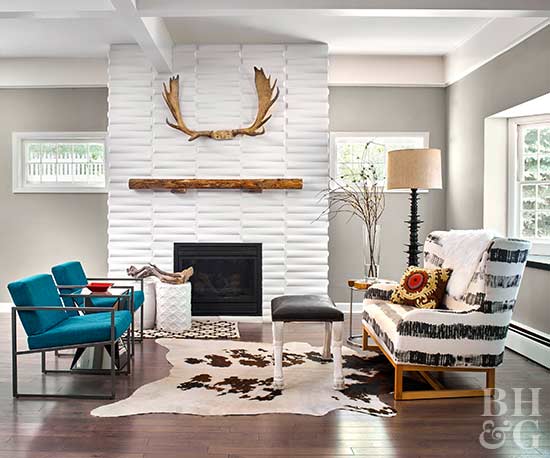
After: Shades of Gray
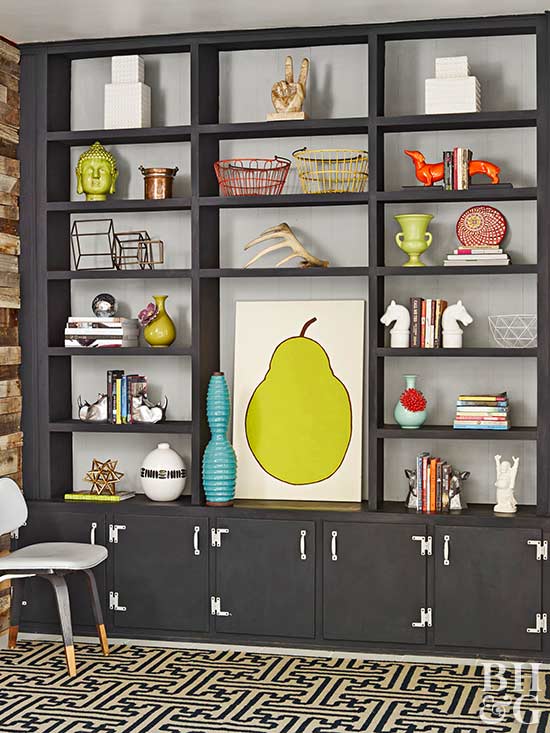
The built-in floor-to-ceiling shelves and cabinets were standouts for storage—they just needed a fresh face. Two shades of chalk-finish paint gave the wall a graphic, attention-grabbing quality. Painting the backs of the shelves showcases the room’s colorful and unique accessories.
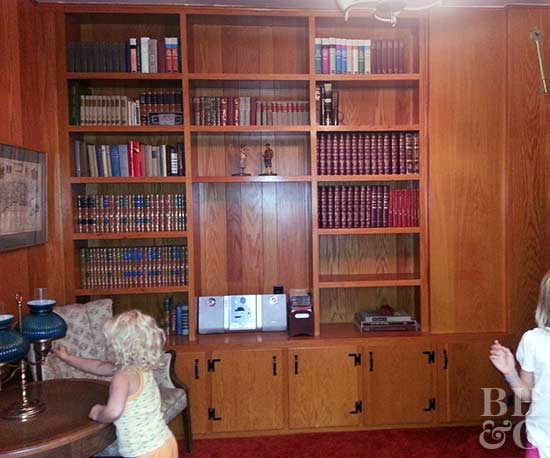
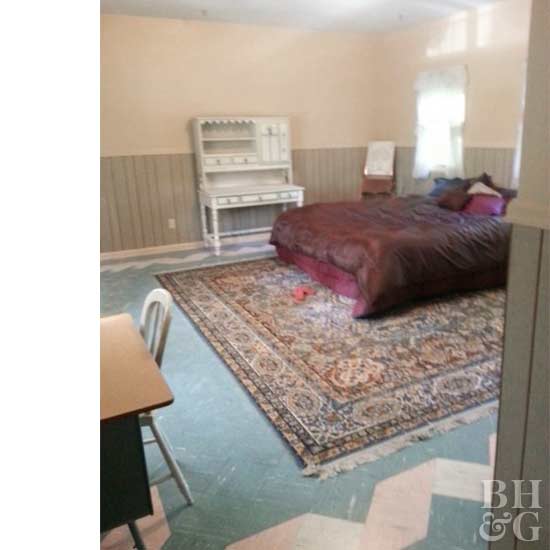
Boys Room
The first-floor bedroom wasn’t fit for a little prince. Oak paneling in the boy’s room had to go, as did the funky baby blue and cream floor tiles.
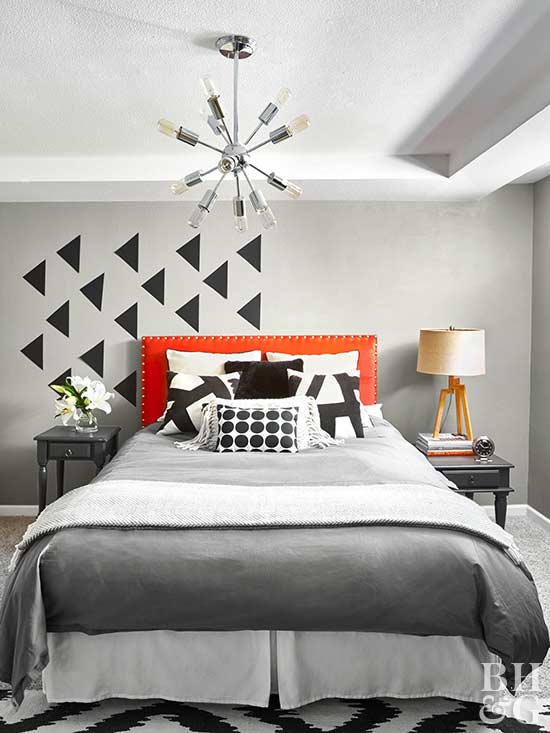
After: Space-Age Style
Oak paneling and rooster wallpaper in the little boy’s room was replaced with serene gray walls enlivened with black triangle decals. The Sputnik-style chandelier fosters a fun midcentury modern mood. The playful feeling gets a boost from a pop of orange introduced via an upholstered headboard
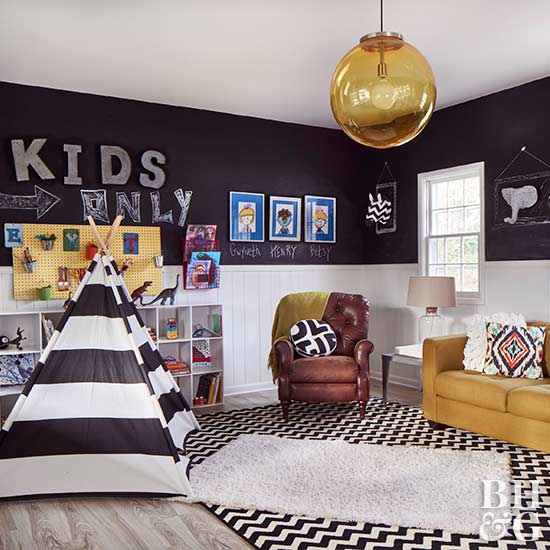
Child’s Play
The second-floor bedroom was reimagined as a playroom. The homeowners laid luxury vinyl tile over the existing ’60s floor tile, painted the wainscoting white, and gave the kids a huge canvas for artwork, spelling practice, and math problems by dressing the walls with black chalkboard paint. Three-dimensional art hangs on the wall inside chalkboard frame
Cottage Dreams
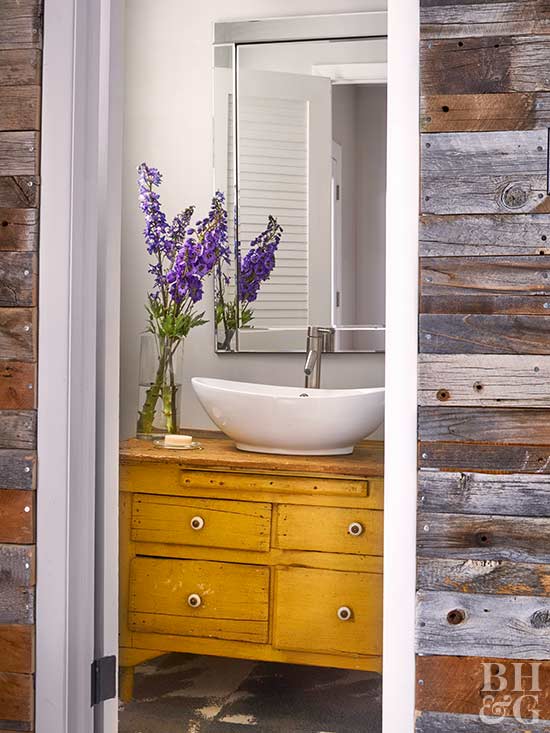
Bathroom Beauty
The contemporary yet rustic powder room vanity was built using a flea market dresser and stylish vessel sink. The top two drawers were removed to accommodate the plumbing, and the drawer faces were reattached with wood glue.
Cool Revivals
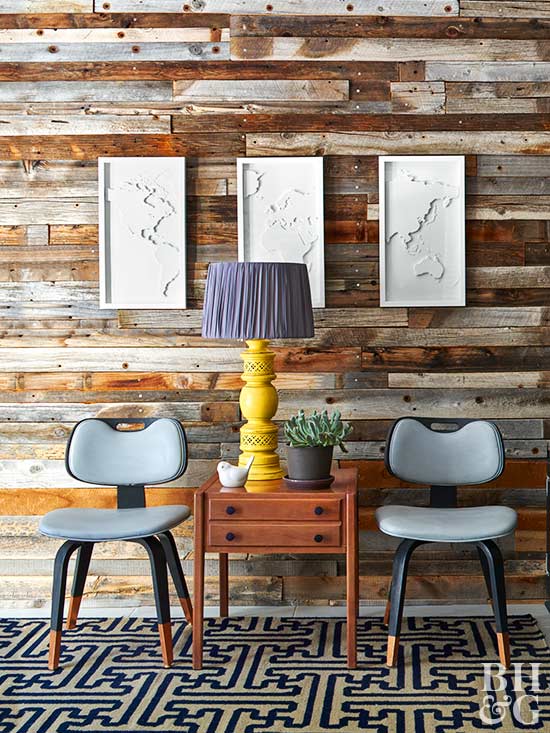
The home office imbued with rustic charm thanks to salvaged wood paneling from an old barn, was a long renovation project for the homeowners. You can now buy wood paneling with adhesive backing, but this project was done before that product was widely available. The chairs were spotted in a dumpster at a local restaurant, which had discarded them as part of a remodel. The homeowners snagged them and added modern appeal with two shades of decorative chalk-finish paint and gold-dipped legs.
Before: Wall Refresh
Dated ’60s wallpaper cloaked most of the house. The homeowners dutifully stripped off the old wall treatment throughout. Their secret recipe for wallpaper removal? Hot water and vinegar in a spray bottle.
After: Painted Beauty
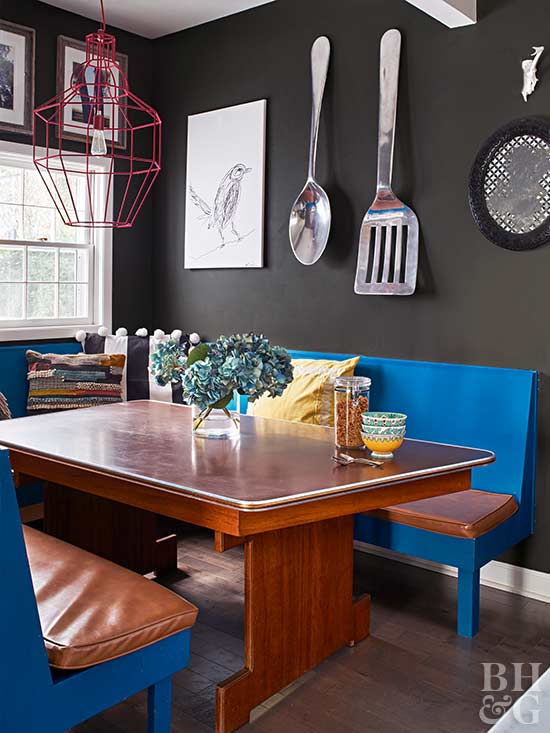
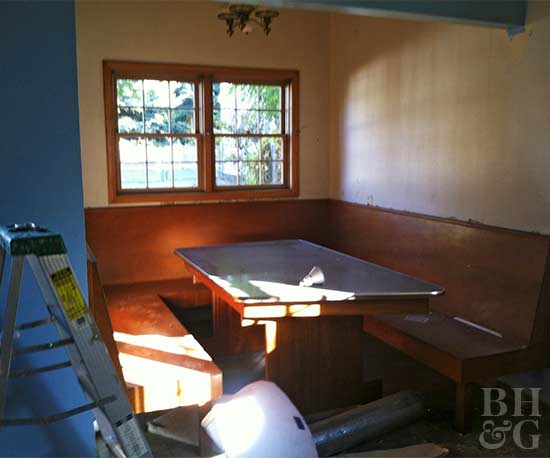
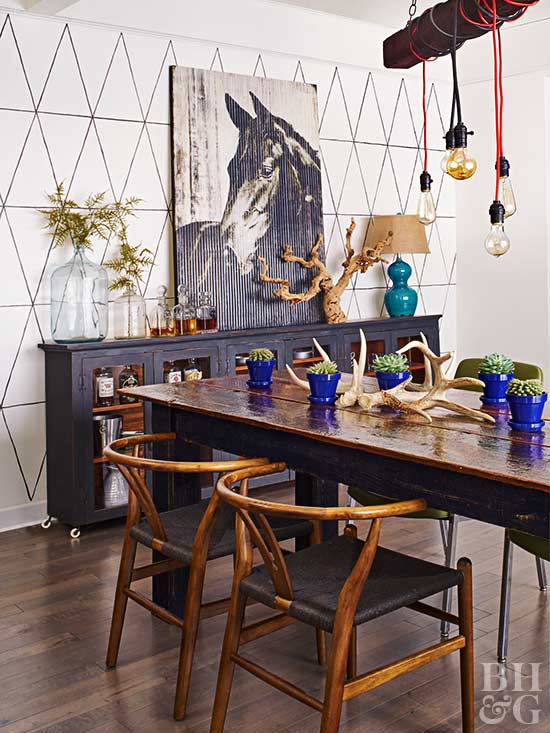
Dining Masterpiece
For a dose of pattern, a black-on-white geometric design was added to a dining room wall. The motif was drawn with a yardstick and pencil then the lines were traced over with black paint using a small brush. The dining room chandelier was built by the homeowners: The couple threaded the cords of five light sockets through a salvaged board and hung it by a chain.
Home Office
and AFTER:

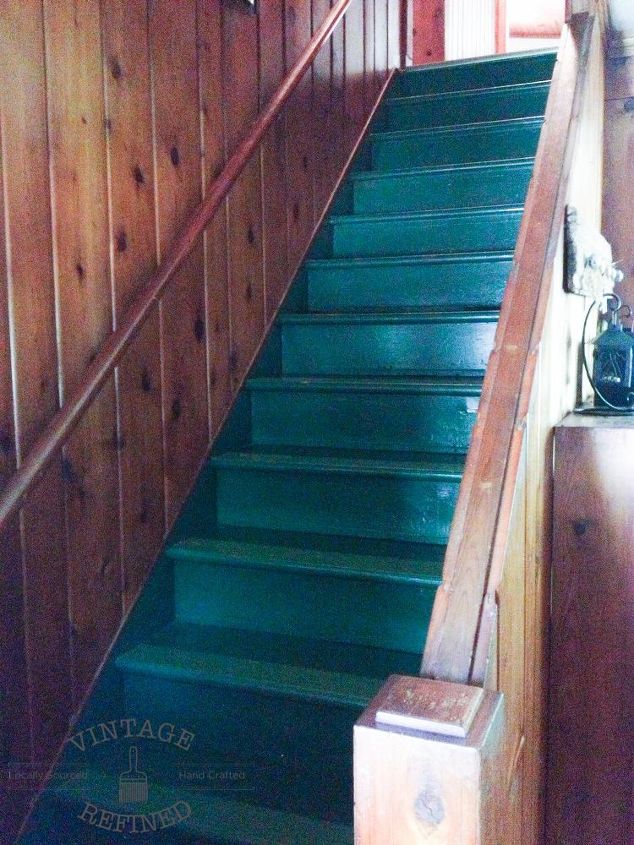
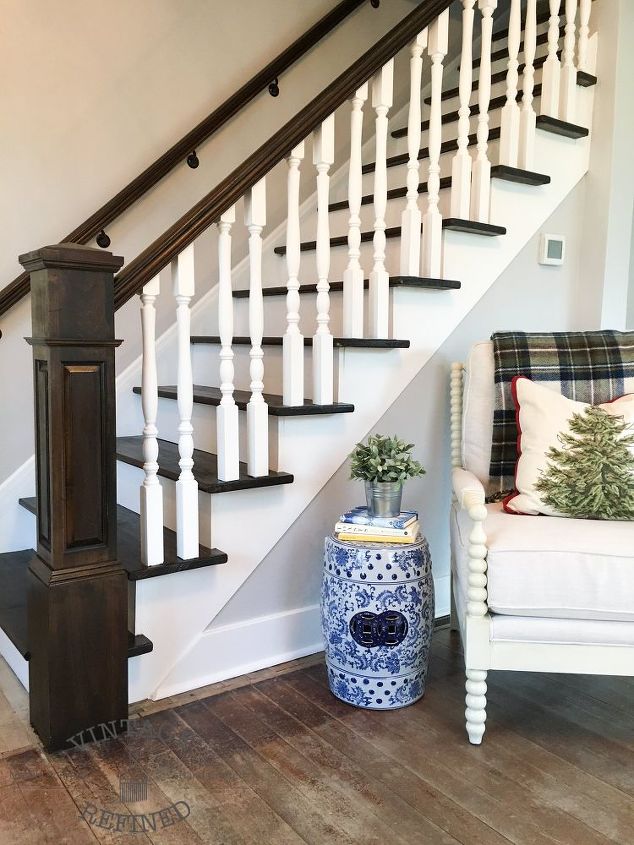
Staircase:
and AFTER:
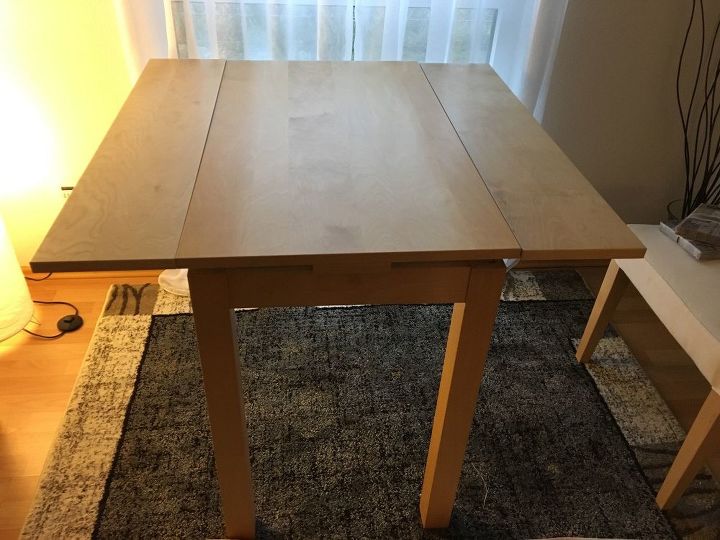
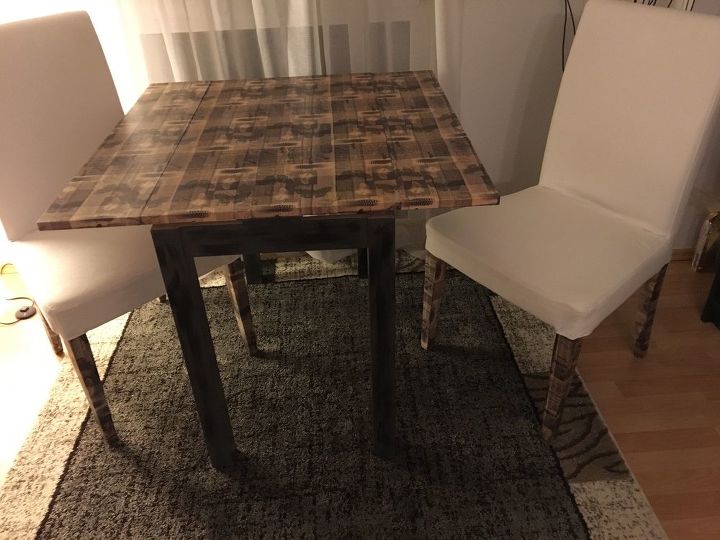
Ikea Table:
and the results after decoupaging the table and Chair legs:
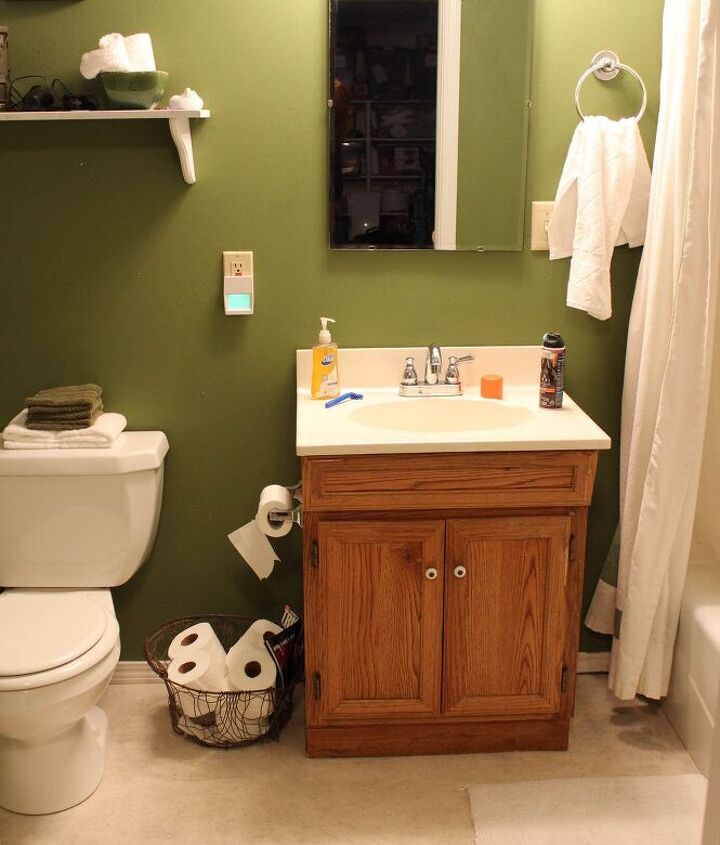
Small Bathroom Makeover:
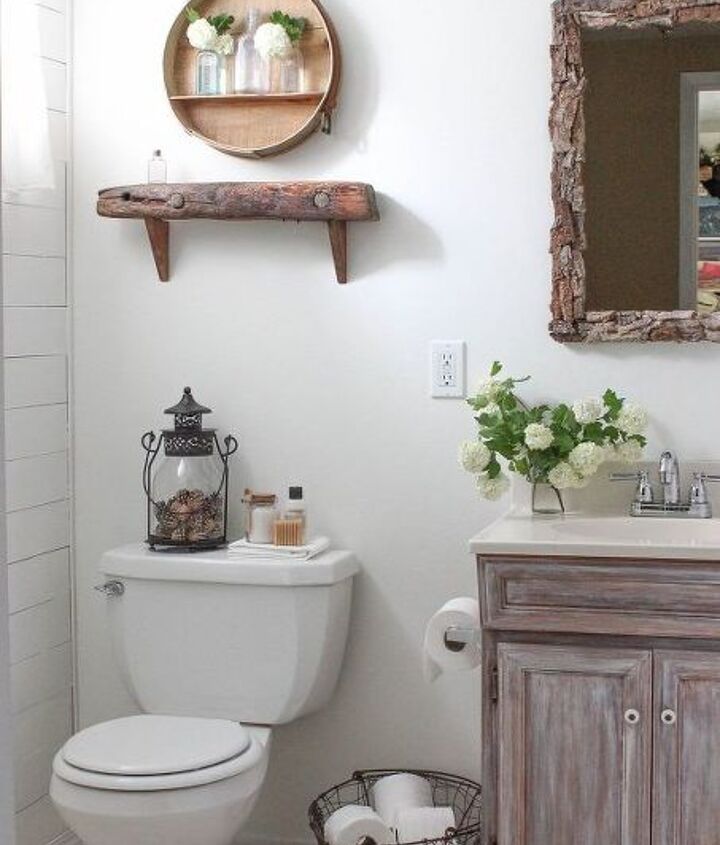
and After:
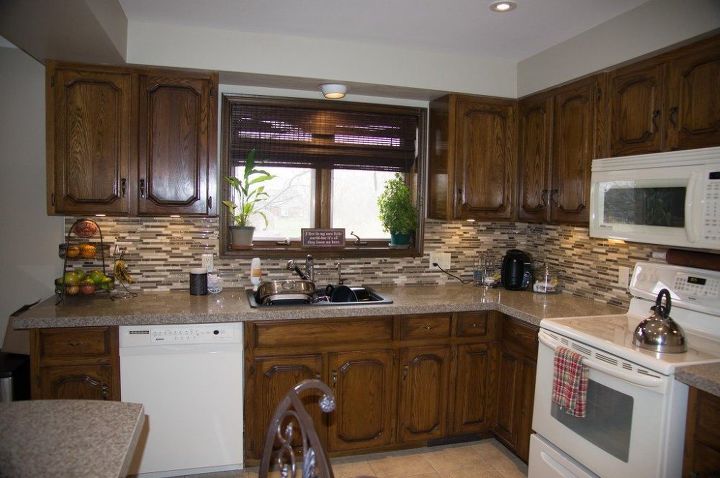
Painting Cabinets
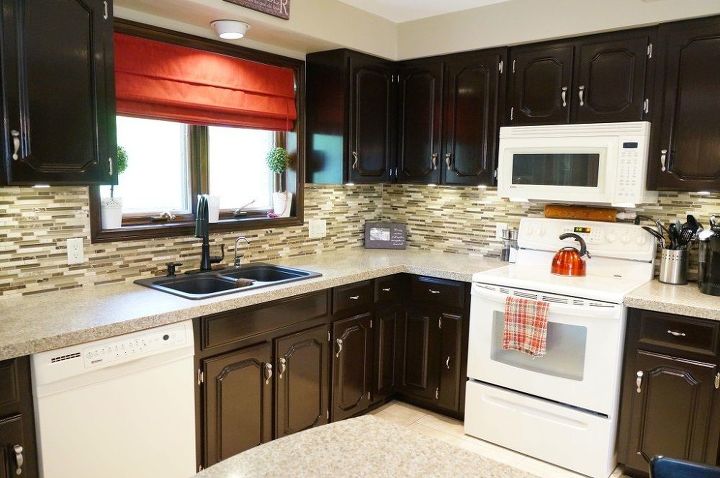
and after painting:
I hope you enjoyed these transformations.

Wow!
LikeLiked by 1 person
Pretty Cool Huh!!!
LikeLiked by 1 person
It is!
LikeLiked by 1 person
:)))
LikeLike
I need this (all of this) for my home!
I’m a modern type of girl; my man’s a lover of, shall I say, the hardier, older pieces!
Slowly, very slowly, I’ve been able to introduce a few more modern pieces, but, there’s a long way to go…
Great choices here!
LikeLike
One step at a time Carolyn….you can always do a makeover on a piece of furniture you already have. Painting is a quick and easy way to modernize a piece of furniture. Check out my ‘ Trash to Treasures’ posts. They may give you an idea.
LikeLiked by 1 person
Yes, Kelley, slowly! I’d love to start with my kitchen cabinets. A fresh coat of paint would do wonders…..
Now, to get my man interested..!! 😉 😉
LikeLiked by 1 person
Wouldn’t that be a wonderful Valentines Gift??? hahaa. A fresh coat does work wonders. Instantly brightens and makes your kitchen look newer! Show him your vision. Before and after cabinets being painted.Good luck honey!
LikeLiked by 1 person
I take it you don’t like to do that kind of stuff?? Show him a pic of my own cabinet remodel: https://kelleysdiy.com/2017/01/20/kitchen-cabinet-makeover/ (or) https://kelleysdiy.com/2017/01/28/refinishing-f-r-cabinets/
LikeLiked by 1 person
What a fabulous idea!
My man is currently painting/has painted our front veranda (plus) so I know he’s all painted out at the moment. But, I love what you’ve done to your kitchen cupboards. I’ve even seen similar mouldings in our local hardware store that could be used in this way… Great suggestion, Kelley; I’ll keep this in mind – and begin the process of putting in my man’s mind… 😉 😉
Love the ideas you present….. 😀
LikeLike
I picked up the molding for my kitchen cabinets at Home Depot. They are relatively the same in the large home improvement stores. Kinda spendy though..at least the kind I picked out. I paid $6 something a foot. I did 35 cabinet doors and drawers. I think it was around $200 for all. I did make mistakes cutting a couple of times.I did, after trial and error come up with solutions to make the cuts perfect.
I am so happy you like my ideas. I’m here if you need anything 🤗😊😀
LikeLiked by 2 people
It’s amazing to see the differences!
LikeLiked by 1 person
I did all those rooms you know?
LikeLiked by 1 person
You did???? That’s amazing!!
LikeLiked by 1 person
No, hahhhaaa, I was just kidding! Too many rooms to clean!!!
LikeLiked by 1 person
I could spend days looking at before and afters, these were all really great.
LikeLiked by 1 person
Me too! I love to look at the differences. How even a coat of paint changes the aviance of the room.
LikeLike
How about some tips on what to do with shoes. My partner she has so many and keeps them all in the original boxes. But probably only wares 2 or 3 pairs.
LikeLiked by 1 person
Sounds like a great idea to me…I’ll get it done by end of day….thank you and have a great day!!!
LikeLike
Ok thanks, I have just returned from a nice bike ride. Have a good day yourself.
LikeLiked by 1 person
Love biking, my little one fits in the front basket, and the other one sits in a make-shift cart. It’s fun!!!
LikeLike
That’s it start how you mean to go on.
LikeLiked by 1 person
If I am just riding around the neighborhood, my larger 25lb er runs beside the bike with Gidget, my smaller doggie in the front basket. It’s fun. If going in traffic, etc, Diesel goes in the back. Makes it a bit unbalanced for me, especially when stopped at light.
LikeLike
I finished my post on shoe hacks!!! Just for you!
LikeLike
Ok thanks Kelly I will take a look.
LikeLiked by 1 person
Change is sometimes hard.
LikeLike
OK!
LikeLike
I just posted for you!
LikeLike
Just colours make a big difference sometimes!
LikeLiked by 1 person
Yes Utesmile, Nothing like a fresh coat of paint to change the whole room! Did you enjoy looking at the changes?
LikeLike
Yes, a fresh coat of paint can change a rooms aviance.
LikeLike
Yes, nothing like a fresh coat of paint to liven up a room and give it aviance.
LikeLiked by 1 person
Wow! Really inspiring!
LikeLike
I’m so glad you liked them! Makes me want to break out the paint!
LikeLiked by 1 person
In Many case, i like before 😊
LikeLike
Seriously?
LikeLiked by 1 person
Sure 😊
LikeLiked by 1 person
🤗
LikeLiked by 1 person
Thank you so much for mentioning my post!!! So sweet!
LikeLike
Thank you!
LikeLike
Thank you kelly for the follow 😀 , Shikha Chandel brought me here and i am glad i landed here. This is so amazing and much more to go through 😛 😛 . Let’s keep sharing 😀
LikeLike
sounds like an awesome plan to me!!!
LikeLiked by 1 person
These are fantastic! Wonderful job!
LikeLiked by 1 person
Thank you so very much! Wonderful compliment, you just made my day!!
LikeLiked by 1 person
My pleasure!
LikeLiked by 1 person
❤️️❤️️
LikeLike